The Robot Design
Base Robot
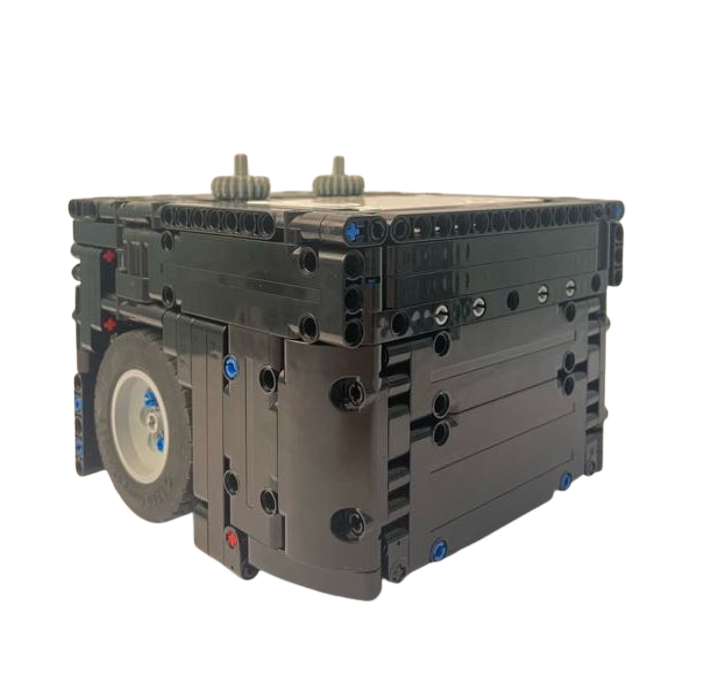
We started building our base robot on October 20, 2025. Based on our previous experience, we chose a rectangular design, which makes it easier to attach different frames and align the robot against walls for accurate positioning.
The robot uses:
- 2 medium motors (M) for driving
- 2 large motors (L) for operating tools
This setup provides a good balance between power and battery efficiency. We also chose front-wheel drive, as it improved turning accuracy compared to our previous design.
Frame System
Our robot uses multiple interchangeable attachments (frames) designed for different missions. All frames are, quick to attach and remove, compact and efficient, color-coded to make them easy to remember during runs. Each frame is designed to solve specific missions.
Blue Frame
Designed for handling multiple tasks in one run using lifting elements and a hook mechanism, allowing the robot to interact with objects without needing to reposition
Green Frame
Uses a heavy impact-based mechanism to move or activate larger elements on the field, as well as a motorized system for lifting tasks
Yellow Frame
Includes pulling and pushing mechanisms to move objects and clear obstacles from the robot’s path
Red Frame
Focuses on completing several actions with minimal movement, improving efficiency by reducing unnecessary driving
White Frame
Uses pneumatic systems to grab, lift, and release objects with precision, making it suitable for more delicate tasks
Mechanical Solutions
We used a variety of mechanical ideas to solve missions effectively:
flaps and push mechanisms
hooks and elastic systems
rotating and sliding parts
pneumatic cylinders for complex actions
For example, in the pneumatic system we used multiple cylinders to grab and release objects efficiently, although controlling airflow required multiple design iterations.
Programming
We programmed our robot using Pybricks and Python.
Our program includes:
a custom menu system
use of variables, conditions, and mathematical calculations
both straight and curved driving
braking and coasting
To improve accuracy, we used:
a gyro sensor
PID control for precise movement and turning
Testing and Iteration
Testing was a key part of our development process. We tested the robot through multiple runs, aiming to reach over 500 points.
After each run, we made improvements such as:
Adjusting gear systems
Changing mission strategy
Modifying attachments
Improving program logic
Even small changes had a big impact on performance, and continuous testing helped us achieve more consistent results.
Strategy
Our overall strategy was to:
complete as many missions as possible in one run
reduce time spent switching attachments
use efficient paths across the field
We also used starting frames to ensure the robot always begins from the exact same position, improving consistency.
Explore Our Full Robot Design Documentation
If you would like to learn more about our robot design, you can explore our full documentation. It covers our design process, attachments, programming, testing, and the improvements we made throughout the season.